Week 4: Creating my First Page
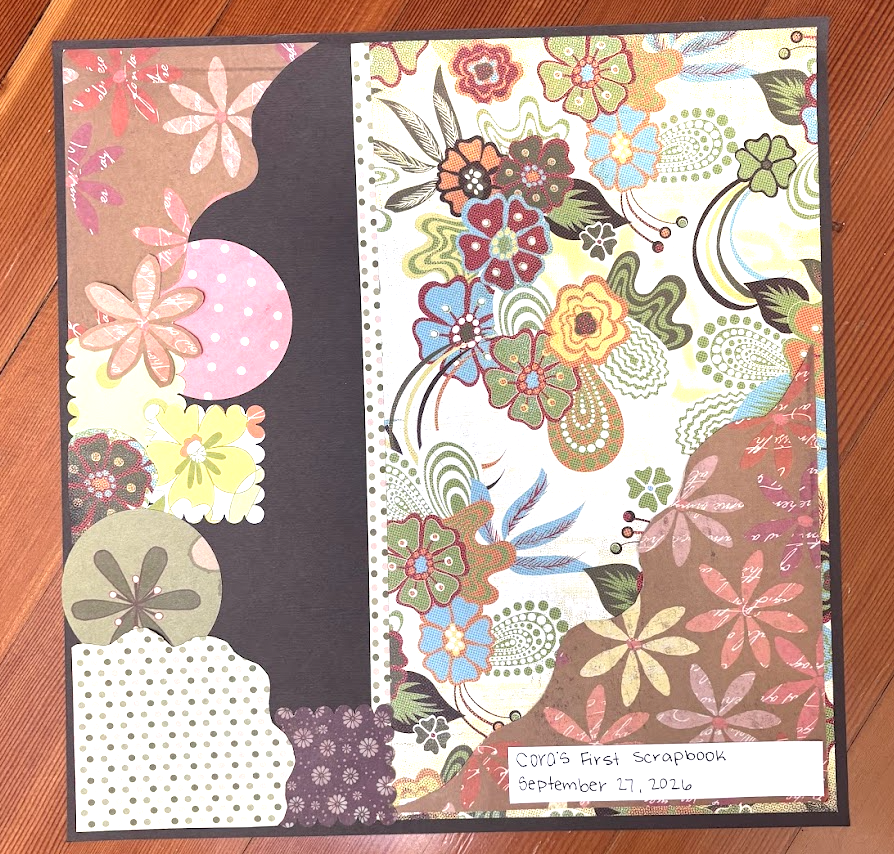
The image above shows my first scrapbook page, where I experimented with a green and brown colour theme, paper layering, and handmade decorations.
What I Did:
To start my inquiry, I looked through some of my mom’s scrapbooks and explored the supplies she used. Then I went to Michaels to get a scrapbook and looked around the store for future supplies I could use for my scrapbooks. I also looked at scrapbook examples on Pinterest, which gave me ideas for arranging paper and using different cutouts to add dimension to my pages.
YouTube was also very helpful to see different scrapbook ideas and layouts. I found a good YouTube video called “My step-by-step scrapbook journal tutorial tips, ideas, and journal with me” by Mara McGinnis. She started by finding scrap paper that matches the colours and themes and this was helpful for me to go through my own papers to see what could go together. I went for a green and brown theme while she went for more pinks and purples. She taught me that I can rip or cut the paper to give it a textured look. She talked about having a balanced look where parts of the same paper went on one side and parts of the same paper on the other which is what I tried to incorporate into my own scrapbook.
I then created a simple cover page for my scrapbook. I added the title “Cora’s First Scrapbook” and the date in the bottom corner. I chose a green and brown colour theme and experimented with different papers, cutting out flowers, and using a paper cutout to make little ruffled boxes. I wanted the colours and decorations to complement each other instead of making the page look too busy. I also learned from my mom that leaving some space around the edges can make a page look cleaner and more organized. This helped me understand the importance of balance and space when designing a scrapbook page. I used my mom’s double sided tape to attach all my papers once I was happy with their placement.
Layout Experimentation:
While creating my cover, I experimented with how I could arrange the different papers and decorations. I learned that the placement of each piece can change how the whole page looks. I liked the idea of spreading similar colours and patterns across the page to create balance instead of having all the decorations in one area. I also realized that leaving some empty space can help the main title and decorations stand out.
What Went Well:
I enjoyed looking through my mom’s scrapbooks and watching the YouTube video by Mara McGinnis because it gave me ideas for what I might want to try. I also liked having so many different supplies to choose from. Learning how to cut out the flowers made me realize how much freedom I had in choosing what I thought looked best. Making the cover helped me get comfortable using the materials and starting my project.
The Supplies I Used:
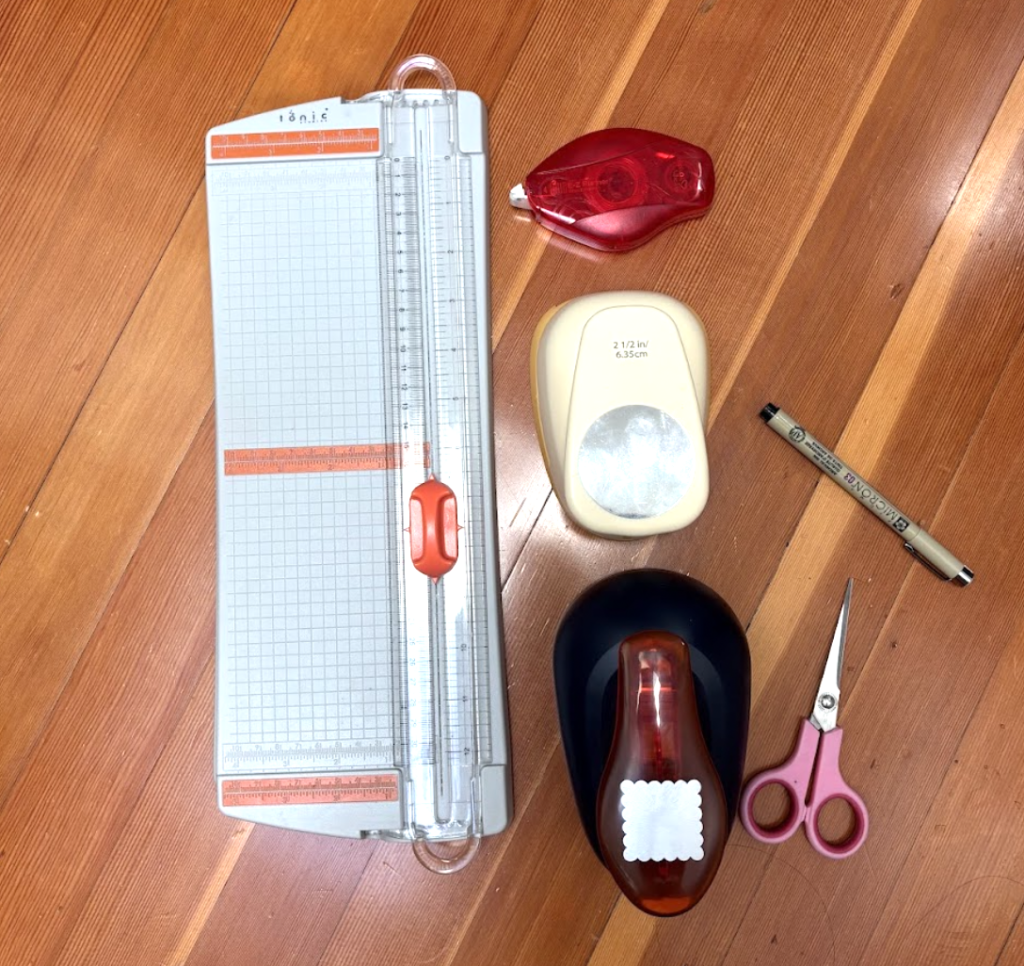
I included a photo below of the materials my mom let me borrow for this project. These included a paper cutter for cutting pages evenly, double-sided tape, two paper punches (one for a ruffled box and one for a circle), a pen, scissors, a solid dark brown/black piece of cardstock, and different colours and patterns of paper. I used the scissors to cut out flower shapes and the paper punches to create decorative shapes for my cover. The double-sided tape helped me attach the different papers without making a mess with liquid glue or a glue stick. I also experimented with layering different pieces of paper to add texture and dimension to my design. Using my mom’s supplies allowed me to explore different techniques without needing to purchase everything myself.
What Went Wrong:
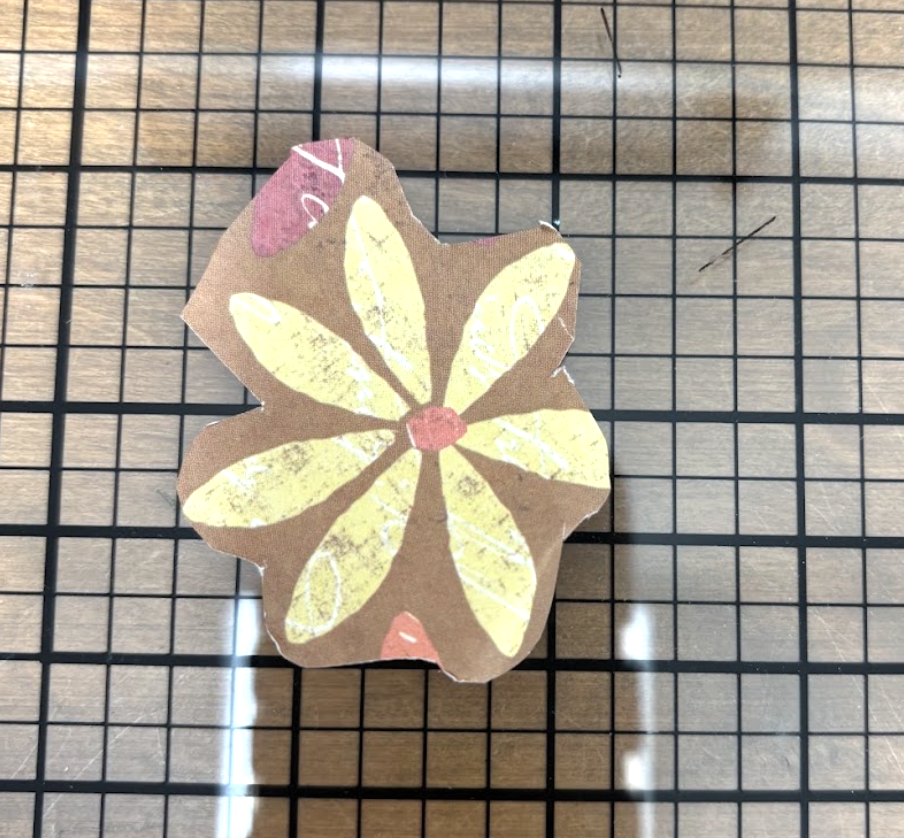
One thing I found difficult was deciding where to put the supplies and how to decorate my page. I had trouble with cutting out the flowers at first because my cuts were uneven and I sometimes cut the flowers too large or accidentally cutting off some of the petals. I also found myself comparing my page to the examples I saw online, which made me feel like my page needed to look a certain way. I included a photo below of a failed attempt of cutting out the flowers.
What I Would Change:
If I made my cover again, I would spend less time looking at other people’s pages before starting. I think watching the video was very helpful at first to get some design ideas, but in the future I wouldn’t want to look at it during the making process so that I can see where my own ideas take me. I would also try to trust my own ideas more instead of worrying about making it look perfect.
What? So What? Now What?
What? I explored scrapbooking, learned about different supplies and layouts, and created my first cover page.
So What? I learned that scrapbooking takes creativity, patience, and planning. I also realized that I do not need to make my page look exactly like the examples I see online. I can use my own ideas and make the page personal to me. I am also excited to learn how to add photos and use them to tell a story on my pages. I also learned that colour coordination, layering, and leaving space around the edges can help create a balanced design.
Now What? Next week, I want to create my first full scrapbook page including photos. I want to focus on planning my layout before I start while still giving myself the freedom to change things as I go.